QuickBooks allows you to create as many warehouses as you need. This blog explains how to activate this feature in QuickBooks and how to buy and sell by warehouse.
How to Enable the Multiple Inventory Site Feature
It is very important to understand what happens in QuickBooks when you first activate the warehouse feature. Let’s go through the steps.
Once you click on “Advanced Inventory Settings”, select the first tab at the top “Multiple Inventory Locations”. Select the box “Multiple Inventory Sites is enabled”. You will then see the window “Enable Multiple Inventory Sites”. Click the down-arrow in the Inventory Site box. You will see an option to create a new warehouse.
You will need to create one warehouse to begin the process. If you have existing inventory, QuickBooks has no idea where each inventory item is located. Inventory will be put into one warehouse during setup. Inventory can later be transferred to the actual location.
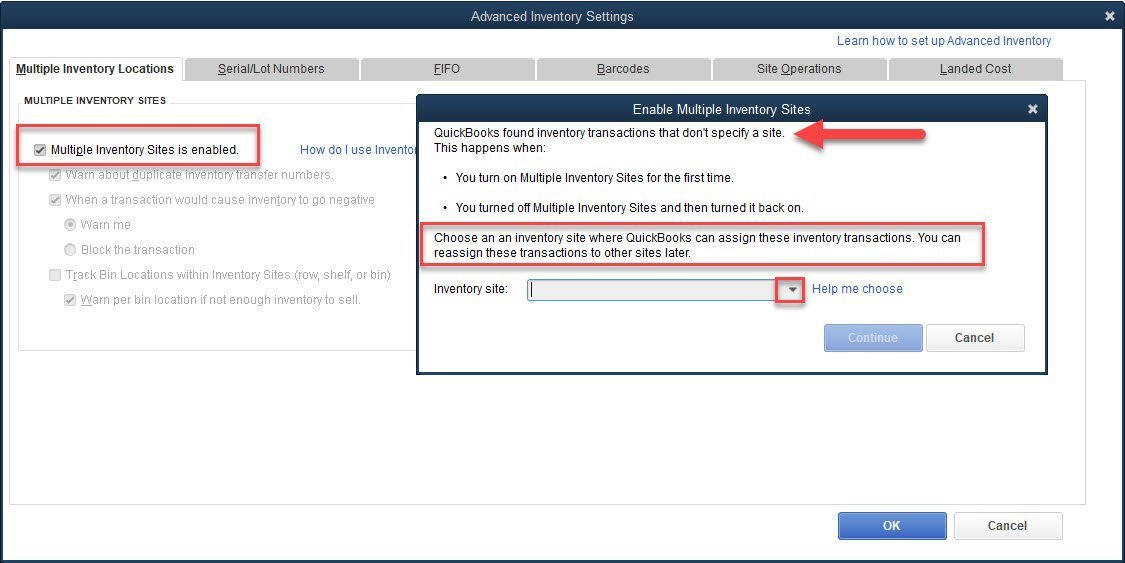
When the Warehouse Feature is activated, QuickBooks places all inventory in one Warehouse location. Inventory must then be transferred in batches to the correct Warehouses.
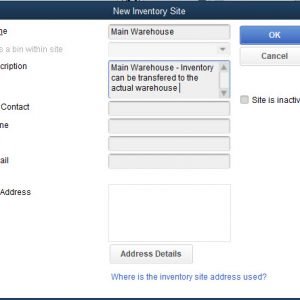
A temporary warehouse location can be setup, an example of which is shown below.

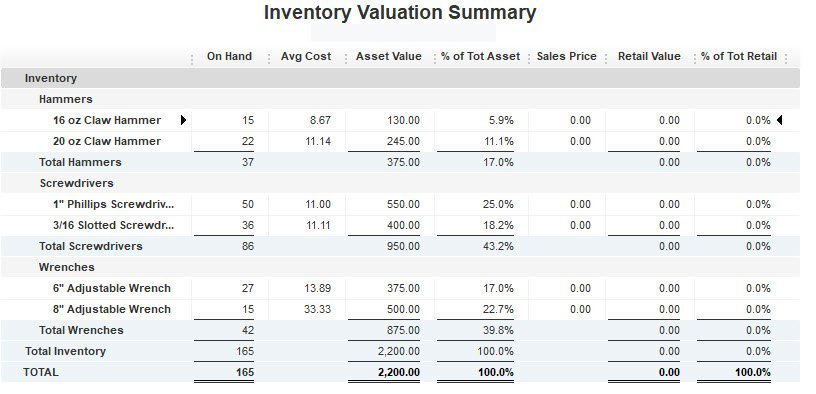
In our example, we have tools in inventory: Hammers, Screwdrivers and Wrenches. Below is our Inventory Report before we assign inventory to a warehouse. Since we have not yet assigned our inventory to a warehouse, there is no warehouse location on this report.
Transfer Inventory Between Warehouses
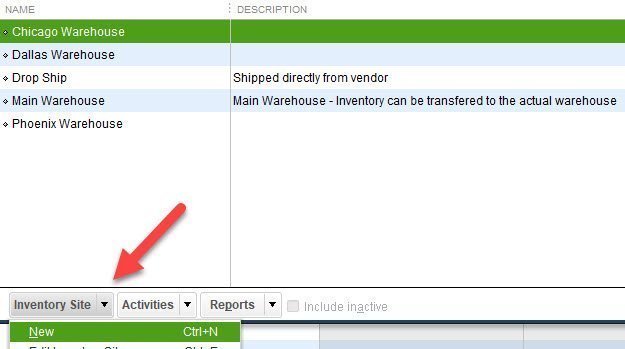
Now we begin the process of transferring our inventory to the actual warehouses. In order to do this, we must create new warehouses. From the menu at the top, select Lists > Inventory Site List. At the bottom left of your screen, click on “Inventory Site” and select new. Setup as many warehouses as you need. There is no limit.
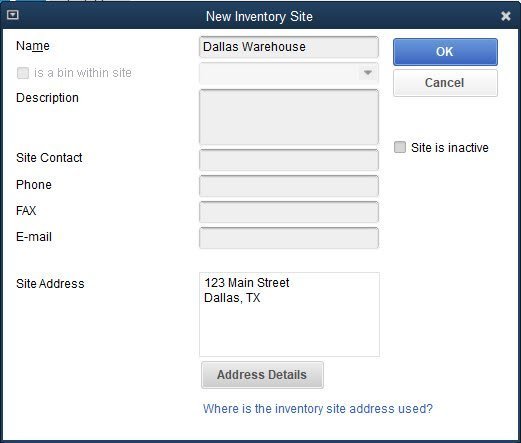
Here is the form we used to create our Dallas Warehouse.
Here is a demo.
Once warehouses are setup, we can begin the transfer process. In order to do this, from the menu at the top, select Inventory > Transfer Inventory. QuickBooks opens the “Transfer Inventory” window shown below.
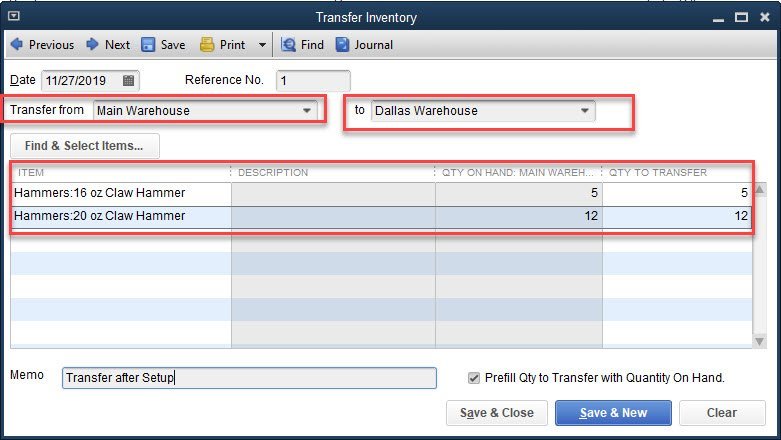
Select the date, the warehouse to transfer from and the destination. Select the items and quantity. Each item can be in several warehouses.
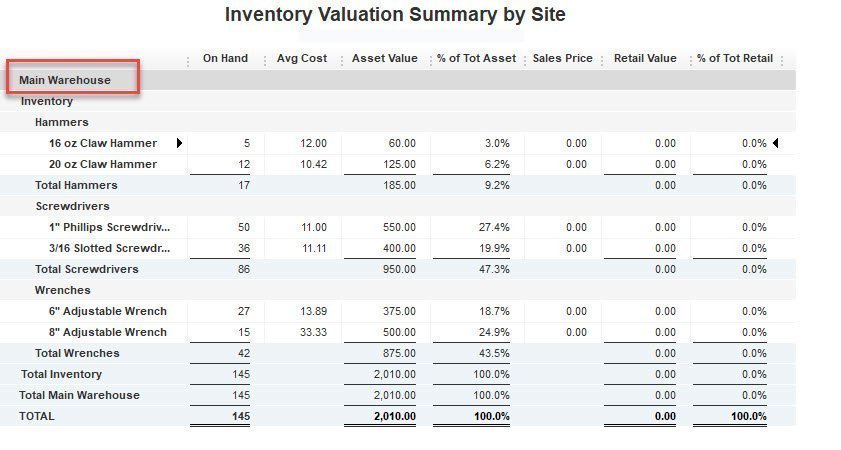
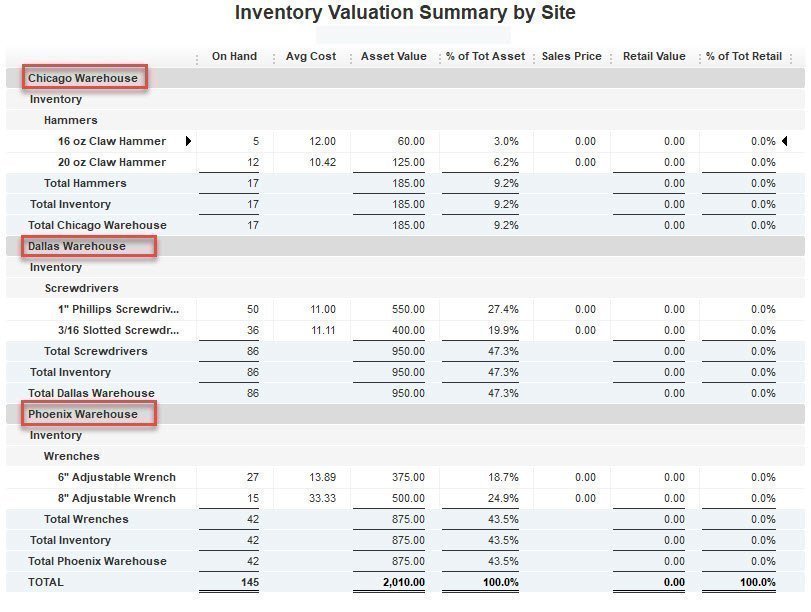
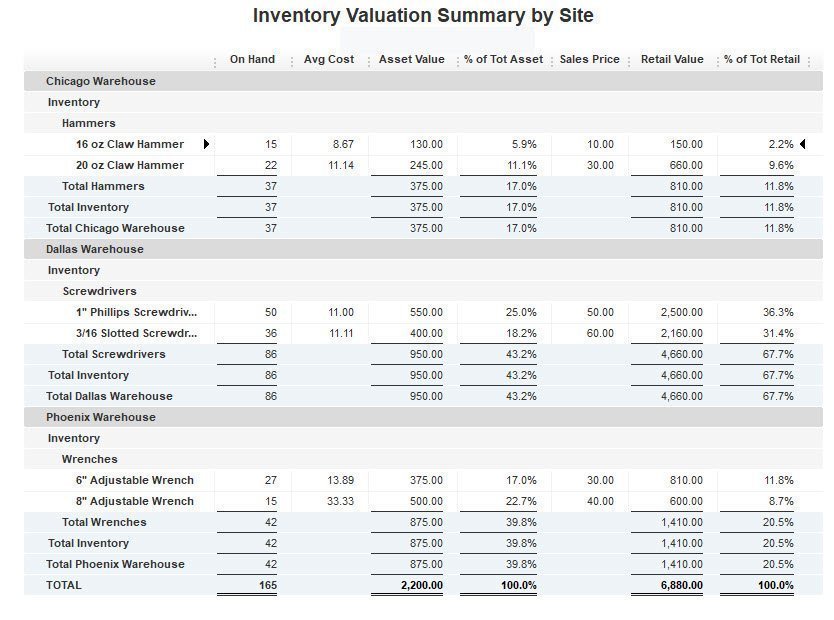
In our example, we transfer all our Hammers to our Chicago Location, Screwdrivers to Dallas and Wrenches to Phoenix. From the menu at the top select Reports > Inventory > Inventory Valuation Summary by Site. QuickBooks shows us a report of our inventory by location.
Buy and Sell Warehouse Inventory in QuickBooks
Once we have transferred our inventory, how does QuickBooks keep track of inventory being purchased and sold?
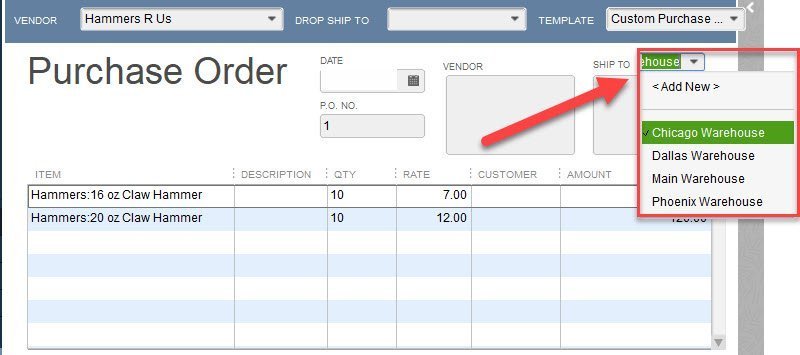
When a Purchase Order is created, a warehouse should be selected in the “Ship To” field.
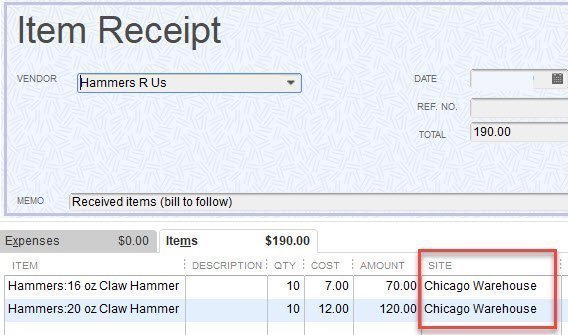
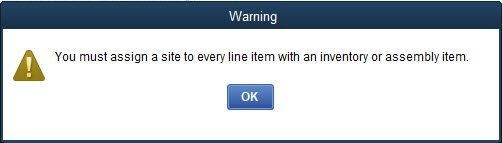
While it is possible to create a Purchase Order without a warehouse location assigned, once you receive the inventory, QuickBooks will require a warehouse to be entered. If there is no warehouse entered on the Item Receipt, you will receive the following message:
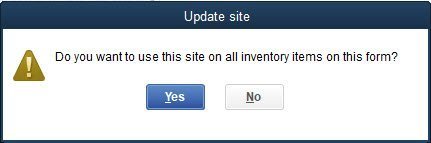
If you have dozens of items on the Purchase Order and they are all being received into the same warehouse, once you assign a warehouse to the first item, QuickBooks can automatically assign all the items on that Purchase Order to the same warehouse. By answering “Yes” to the message below, all inventory items being received on that form are assigned the same warehouse.
See the demo below.
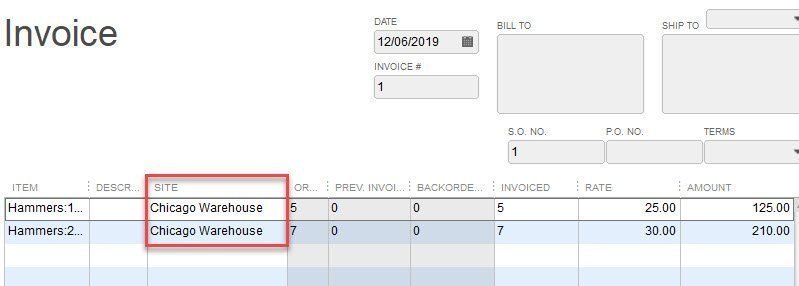
Sales Orders and Invoices also work the same way. A Sales Order can be created without a warehouse assigned, but an Invoice cannot be created without a warehouse location. It is always best when possible to designate a warehouse as early in the process as possible.
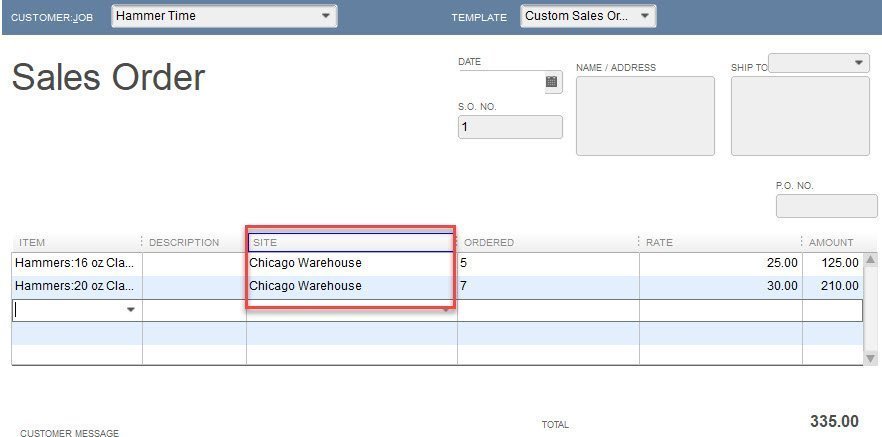
The warehouse field must be used on an invoice.
Quantity by Warehouse
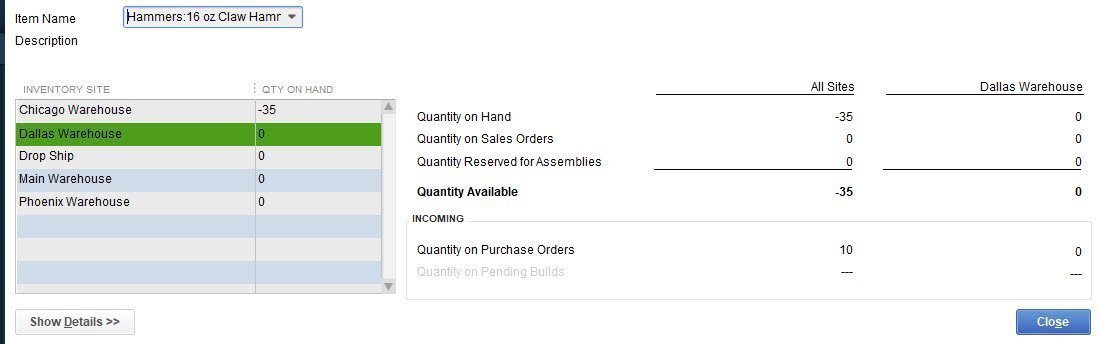
So what if you try to sell inventory and there is not enough in that particular warehouse? QuickBooks alerts you with the following message:
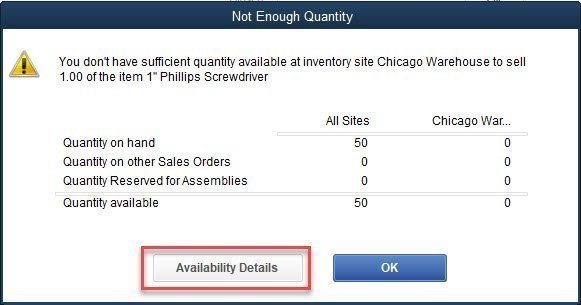
Selecting “Availability Details” opens the current availability window which provides additional warehouse specific information.
Reports for Warehouses in QuickBooks
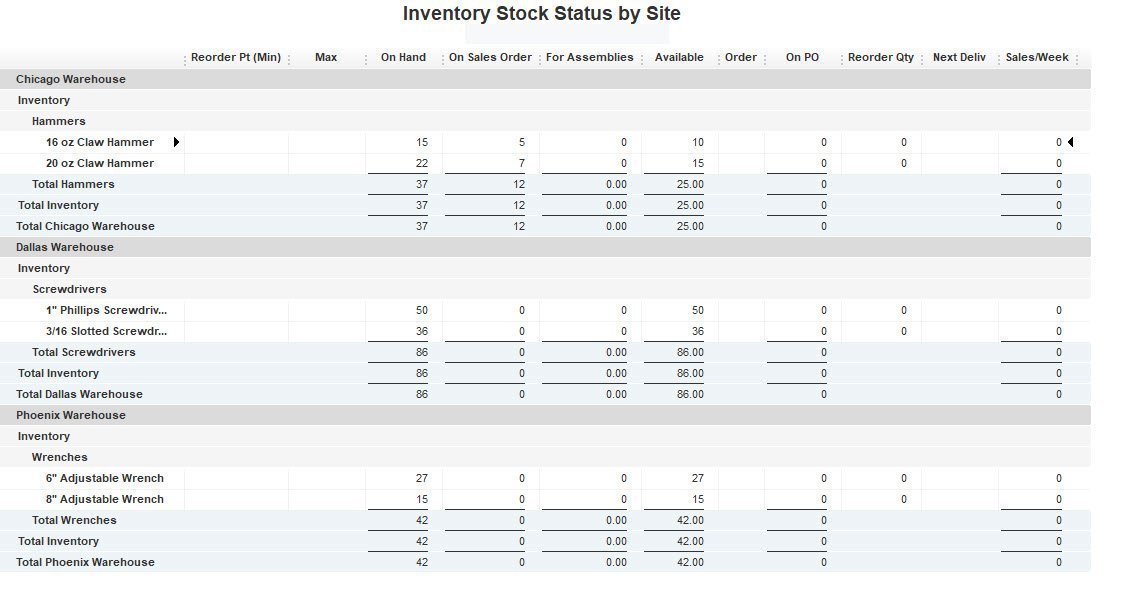
There are many ways to view inventory information by warehouse. Several reports are available by selecting Reports > Inventory. Below is an image of the Inventory Reports menu.
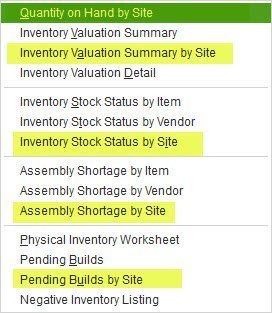
Here are examples of some of these reports:

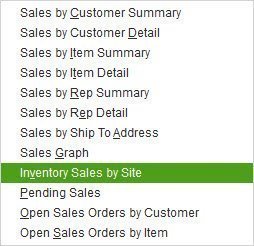
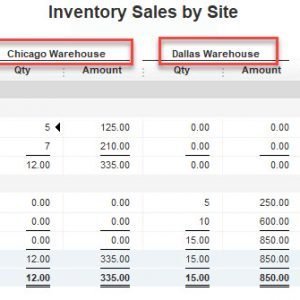
Another report is available by selecting Reports > Sales.
About the Blogger

Tim Plue
I am an Advanced Certified QuickBooks ProAdvisor. I have taught QuickBooks and Bookkeeping classes for over 12 years. I enjoy helping Small Business Owners run their business with QuickBooks. I can help you wherever you are located!